Welcome back, friend! In this article, I’m going to show you how to paint a beautiful summer sky. By the end of this tutorial, painting backgrounds that can bring your artwork to life will seem easy peasy!
In the last lesson we went through the process of painting a foggy morning that was both simple and effective. Some of you showed me your results and I was amazed by the gorgeous backgrounds you painted! I can’t wait to see what you create following today’s tutorial!
Today You will learn how to paint sunny summer skies. The kind that brightens up your day with just a glance! Are you ready? Let’s do this!
Remember that I’ve created color swatches for you to use but you’re welcome to choose your own colors. You can get them on the Resource Library along with my other resources for artists like you.
Step 1: Creating the a gradient in the sky

Before you start painting backgrounds, there are a few things you need to know.
The upper part of the sky will always be darker than the lower parts of the sky, even if the sun is shining bright at the top.
The explanation is simple, to our eye, the top of the sky is closer than the horizon.
Have you ever looked at the horizon and noticed that the mountains look oddly blue? But if you go to the mountain, it is NOT blue at all?
That’s because the further an object is from our sight, the more it blends in with the colors of the sky and the rest of its surroundings and the less saturated and defined it looks.
That’s how you can create depth of field in your artworks. By ensuring that the elements that are closer to the ‘camera’ are more saturated, more defined and more detailed than those that are further away.
That’s why the top of the sky is darker than the part closer to the horizon.
Take action:
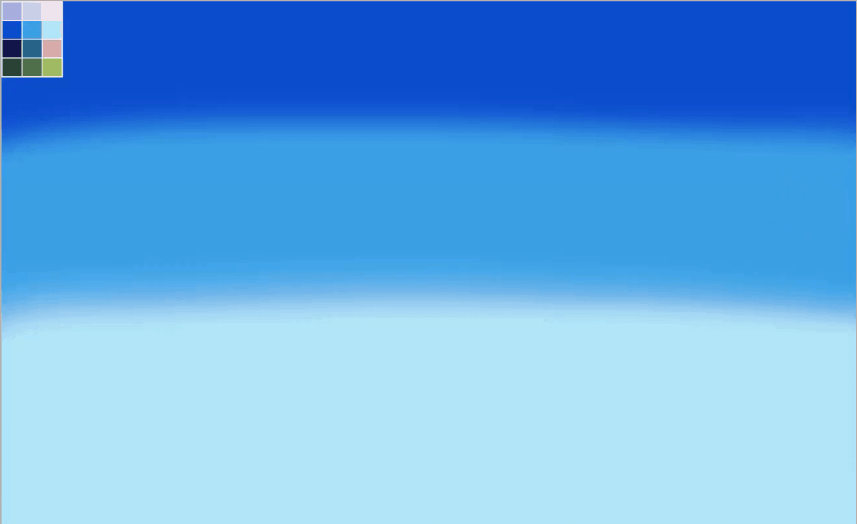
- Use the bucket tool to fill the whole canvas using the darkest hue from the color swatches.
- Choose a lighter blue and paint 1/3rd of the canvas with it, in the middle section
- Choose an even lighter shade of blue to paint the bottom third of the canvas
- Use the Water tool set to 100% density and min. size and blur all the colors together using upward and downward movements with your hand

Step 2: How to paint the sun in the sky & use it as a light source
Focus on the sun or light source first. If you don’t decide where the light source is before anything else, you’re likely to make mistakes when shading the clouds. You may also get confused about where the light source is and where the shadows should go.
The sun can be a good light source if you’re painting a sunny day. To paint the sun in the sky, create a new layer and set it to ‘Luminosity’ mode. This makes anything you paint in that layer super shiny.
Use the airbrush and a light orange color to start painting a circle wherever you’ve chosen to place the sun. Using the ‘water’ tool (or any blurring tool you have at your disposal) to blur it and make it look like a soft glow.
Now, use the airbrush tool again using an orange color to add a bit more warmth to the sun.
Finally, I choose a white color and create the inside of the sun.
If you want to add some sunrays coming out of the sky, you can do so by using the pen with minimum density set to 0%. Tthat way, the tablet will recognize the pen pressure and make a beautiful, thin line.
To make it shine even more, you can use the airbrush with a very low opacity and size and go over each sunray.
Take action:
- Decide where the light source is going to be placed
- Set the layer to Luminosity to make the sun shine bright
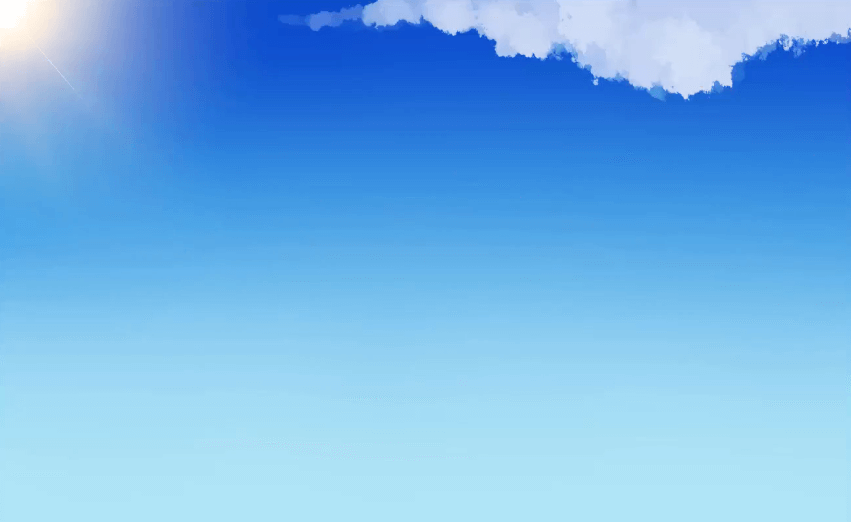
- Create the sun glow with the airbrush and an orange hue and then blur it with the Water tool
- Paint the inside of the sun with the airbrush and a white color
- Use the pen to create thin lines to act as sun rays
- Softly airbrush over the sun rays to create sunshine around them
Step 3: Painting the clouds (the fluffier the clouds, the better!)
I taught you a way to paint clouds in the previous background tutorial, but this is another method and it’s even better. Painting clouds this way is the most fun thing EVER.
Now that we have our gradient and the light source, it’s time to start painting the clouds.
Remember what I told you about distant objects being less defined and saturated than nearby ones? That’s also the reason why you need to paint the clouds at the top of the sky bigger and brighter than those near the horizon.
The ones near the horizon are very far away, which usually lets us see more clouds but they look smaller.
They’re also not as bright as the ones near the viewer because they follow the same rule above: distant elements are less defined and blend in more with their surroundings.
You need to choose the ‘Marker’ tool. It should be located right below the pen. Now, you need to set it up properly to create the right effect:
- Hardness needs to be set to the maximum (the rectangular option)
- Minimum size needs to be set to 0%
- Density set to 100%
- The texture needs to be “spread”
- And last but not least, the Blending and Pesistence settings need to be at around 40 to 50%
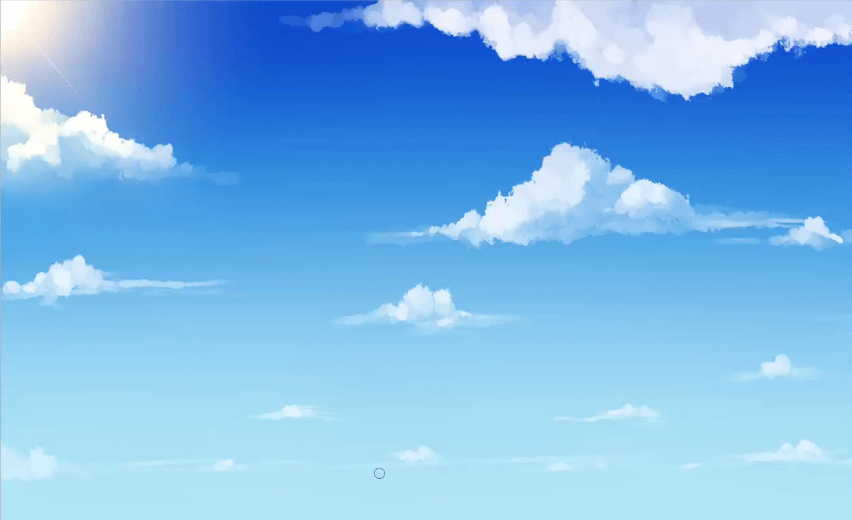
Start painting the clouds using semicircular movements with your hands. The more pressure you use in your strokes, the brighter the color will be.
If you use softer strokes, it will be more transparent, have less opacity.
The sun is at the top of the sky, which means the upper part of the clouds will be brighter than the bottom part.
If you’ve painted something too bright, you can choose a blue color similar to that of the sky or a bit softer and paint the bottom of the clouds to make it look more realistic.
Remember that the clouds at the top should be bigger and use up more space than the ones at the bottom of the canvas. Since they are further away, we can see more clouds but they are smaller and less detailed than the ones at the top.
Step 4: Add illumination effects to the piece – Painting sunshine and Sunrays
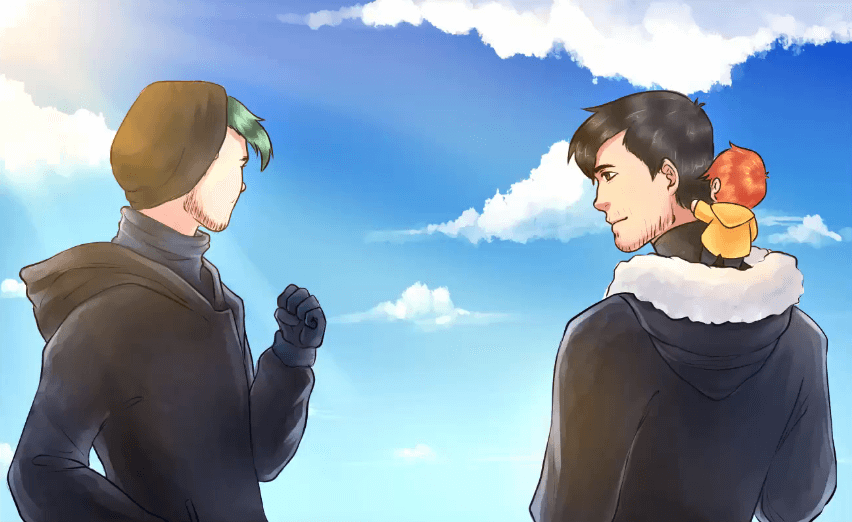
Now that we’ve painted our sky and our beautiful clouds, it’s time to bring the characters to the front and center of the piece!
It’s time to add the last touches to make sure they look like they are in there, enjoying the beautiful clear skies!
- Place the characters above the layer containing the clouds.
- Now, create a new layer and set it to ‘Luminosity’.
- Use the airbrush to illuminate the characters and create some sunshine. Set the airbrush to have the minimum size set to 100% and the density set to 20-25%.
- Now, choose an orange hue and start airbrushing over the characters. Follow the direction of the sunrays to make it look more natural! You can airbrush from the sun to the characters in a swift movement.
If something looks off to you, use the water tool at 100% density to blur it and adjust it as you see fit.
Now, we’re going to create a few sunrays.
- To do this, we need to use the brush tool set to a relatively small size (we don’t want to create huge sunrays, now, do we?), the minimum size needs to be set to 100% and the density to around 20%.
- We want the edges of the sunray to be clear but the overall opacity to be low so that they look like light rather than weird things in the sky.
- To paint each sunray, make sure you follow the direction of the sunlight. Imagine the sun is a perfect circle, the sunray needs to start in the middle of the circle. If you misalign the sunrays, it won’t look natural so be careful when painting the sunrays.
You can paint them in a different layer (also set to luminosity!) if you’re worried about messing it up.
The sunrays can reach as far as you want (granted that there are no objects blocking it). If you want to make the sunray dissipate after a while, you can use the Water tool to blur the end of the sunray.
The blue of the sky will reflect on the characters. To create this effect, you can use the airbrush with a blue or purple hue and low opacity to paint the areas where the light doesn’t reach.
Step 5: Add sun glare to make it all come together
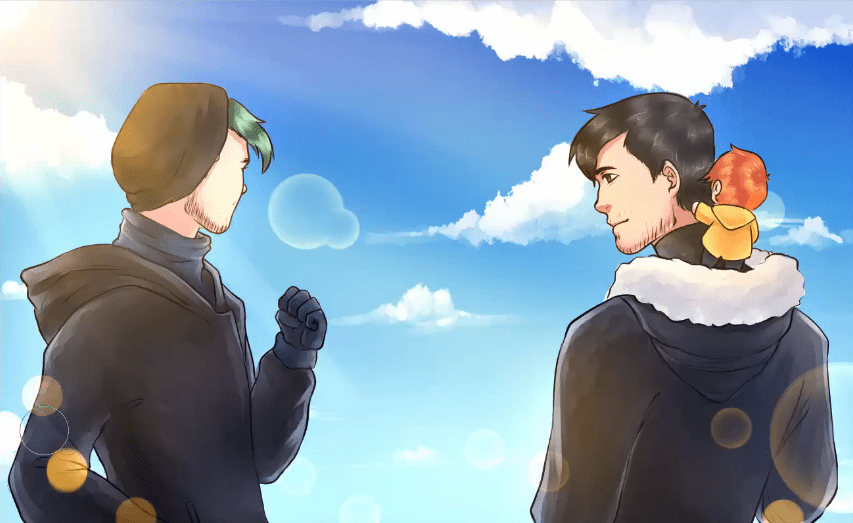
And… to top it all off, we’re going to create some sun glare!
- Create a new layer, and also set it to luminosity.
- Choose the brush tool and set the stabilizer to 0%. Minimum size to 100%. Use the simple circle texture and the rest of settings below 20%. Now, draw circles near the sunrays or if you’re feeling rebellious add them wherever, add lots of them for the heck of it! >:)
- Now, choose the eraser tool, choose the soft edges setting, and reduce the minimum size and density to around 50%.
- Erase the inside of each sun glare circle very softly, leaving only the outside, kind of forming a gradient.
Make sure your brush is smaller than the glare or you will delete the outside as well!
Step 6: Celebrate! Painting backgrounds is your new skill!
Congratulations on painting a beautiful sunny sky for your artwork! Soon you’ll be a master painting backgrounds for your pieces!
Next week you’re going to learn how to paint a sunset scene so stay tuned for that!
I’ve created a checklist of the steps you need to take to create the perfect sunny sky. Click the button below to get it and you’ll make sure you never forget a step when painting your background!
I’m also giving you my color swatches to make it easier for you to practice. Snatch them by signing up below!


My sky in my seascape is awful and I need some help please to make it more realistic
Hey Rosie, thank you for your patience. I have a more detailed tutorial on painting clouds and skyscapes in my Youtube channel. You can watch it here: https://youtu.be/dW34CY2tR04?si=nOTTc9crSx3qwRdZ
What colors do I use?
Hey George! Throughout the page I offer you the possibility to download my FREE kit which includes the color swatches I recommend. If you don’t want to download it, the easiest way to get the swatches would be to just color pick them from this image https://paintingdreamscapes.com/wp-content/uploads/2018/08/painting-backgrounds-video-tutorial-kit-how-to-paint-a-sky-download-preview.png
If you want to choose your own colors, remember, darker blue for the top of the sky and lighter blues for the mid and bottom part of the sky. Whatever is closest to the horizon will be lighter in color because it’s further away! 🙂